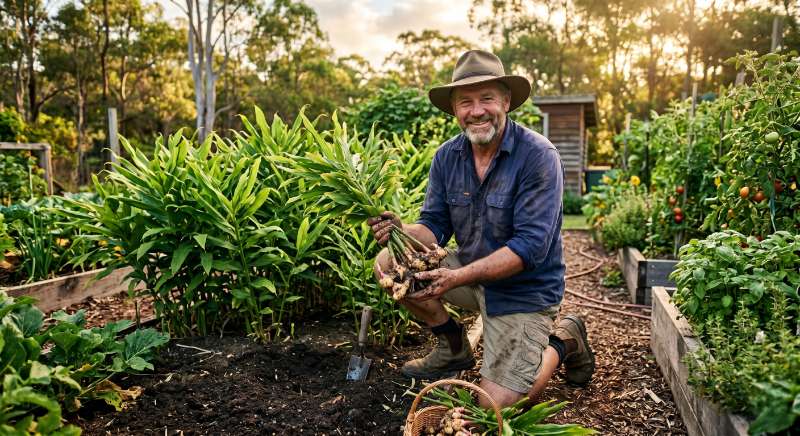
There’s nothing quite like snapping off a knob of ginger you grew yourself — fragrant, juicy, and free of the chemicals that coat most supermarket roots. The good news for Australian gardeners is that ginger is one of the easiest edible rhizomes to grow at home, especially when you start with a quality ginger growing kit.
Why Grow Your Own Ginger?
Buying fresh ginger weekly adds up fast — and most of it shrivels before you use it. Growing your own solves both problems:
Cost. A single piece of seed ginger can produce a kilo or more per season, paying for itself many times over.
Freshness. Home-grown ginger is juicier and more aromatic than store-bought. Young ginger straight from the soil doesn’t even need peeling.
Zero waste. Harvest only what you need and leave the rest in the ground.
If you’d rather skip straight to cooking while your crop matures, Kai Kai Farm also sells fresh, organically grown no-spray ginger harvested to order.
What’s in a Ginger Kit?
A complete kit from a quality Australian grower like Kai Kai Farm typically includes:
Seed ginger (rhizome) — fresh, organic, no-spray ginger with healthy “eyes” ready to sprout
A natural soil booster or tonic — a fermented plant extract or seaweed tonic to support root development
Growing guidance — clear planting and harvest instructions for Australian conditions
Starting with purpose-grown seed ginger matters: supermarket ginger is often treated with growth inhibitors that prevent sprouting, so a dedicated kit gives you a far better strike rate.
Pot, Soil, and Location
You don’t need a big backyard — ginger grows beautifully in containers, which is why so many people search how to grow ginger in a pot.
Pot: Choose a wide, shallow container at least 30–40 cm across and 30 cm deep. Ginger grows horizontally, so width matters more than depth. Ensure good drainage.
Soil: Ginger wants rich, free-draining soil that holds moisture without becoming waterlogged. A quality potting mix blended with compost works well. Adding bokashi pre-compost or a fermented tonic builds the soil biology your ginger will thrive on.
Location:
Outdoors: Morning sun with afternoon shade is ideal. Full Australian summer sun can scorch the leaves.
Indoors: A warm, bright windowsill or balcony works well in cooler regions — and you can move the pot to follow the warmth.
Step-by-Step Planting Guide
In most of Australia, ginger is planted in spring (September–November) and harvested the following autumn.
Pre-sprout (optional). Sit your seed ginger somewhere warm for 1–2 weeks until small green buds appear.
Cut into pieces. Break the rhizome into 4–5 cm sections, each with at least one or two eyes. Let cut surfaces dry for a day to prevent rot.
Plant shallow. Lay each piece flat, eyes facing up, covered with 3–5 cm of soil.
Water in. Give a gentle, thorough soak — then ease off until shoots appear (3–8 weeks).
Keep warm. Aim for soil temperatures above 20°C for the fastest growth.
Watering, Fertilising, and Care
Watering: Keep soil consistently moist during the growing season, never soggy. Reduce watering as leaves begin to yellow in late summer — this signals the rhizomes are bulking up.
Fertilising: Ginger responds brilliantly to natural feeding. The liquid drained from a bokashi bin — known as bokashi leachate — makes an outstanding bokashi garden fertiliser. Diluted roughly 1:100 with water, it delivers a microbe-rich feed that ginger loves. Kai Kai Farm’s bokashi composting range lets you turn kitchen scraps into both pre-compost and that liquid gold. Their Bokashi Bran & Bins guide explains exactly how to harvest and dilute the leachate.
Care: Mulch around the base to retain moisture and suppress weeds.
When to Harvest
You can harvest ginger at two stages:
Young ginger (4–6 months): Mild, juicy, and floral with paper-thin skin — no peeling needed. In Australia, young ginger season typically runs March to June.
Mature ginger (8–10 months): Once leaves die back in late autumn or winter, rhizomes are fully developed, more pungent, and store much longer.
To harvest, gently dig around the clump and either lift the whole plant or break off what you need. Save a few healthy pieces with good eyes to replant next spring — your kit becomes a self-renewing supply.
Growing by Climate Zone
Queensland and Northern NSW: Ginger’s happy place. Subtropical warmth and humidity mean near year-round growing with minimal fuss. Provide afternoon shade and consistent moisture.
Southern NSW, Victoria, and cooler regions: Ginger is frost-tender, so timing matters. Grow in pots so you can move them to sheltered spots or bring them indoors over winter. A greenhouse or warm patio extends your growing window significantly.
Container growing lets you control the microclimate — which is exactly why a ginger kit works reliably across Australia, no matter your postcode.
What to Cook With Fresh Ginger
Once you’re harvesting your own, the options are endless:
Ginger tea — fresh slices steeped with honey and lemon
Stir-fries and curries — grated straight in for a bright, fiery lift
Pickled ginger — thinly sliced young ginger quick-pickled for sushi and salads
Ginger syrup — simmered with sugar and water for cordials and cocktails
Crystallised ginger — candied chunks of mature ginger for a sweet-spicy snack
Pair your home-grown ginger with fresh gourmet produce from the farm for a seriously good kitchen.
Get Started With a Ginger Kit
Growing your own ginger starts with quality, no-spray seed ginger and a little living soil. Kai Kai Farm is a family-run organic farm on Tamborine Mountain in the Gold Coast hinterland, shipping across Australia.
Start with Kai Kai Farm’s organically grown no-spray ginger, feed it with their bokashi composting range and natural garden tonics, and grow fresh ginger right at home — the no-spray, low-waste, farm-to-kitchen way.